RegistrarConnect for Faculty & Staff
Navigating the RegistrarConnect Portal
RegistrarConnect is designed to replace all former Registrar's Office tickets and request forms. This new system will enable students to submit registration requests, academic petitions, and student information updates. This tool also gives instructors and advisors the ability to approve specific student requests as well as submitting their own requests.
We understand that every new tool takes time to learn and the Registrar's team has developed the following tutorials and guides to help you successfully navigate this system.
Please note that RegistrarConnect will not replace any of the functionality now offered in APR2. We encourage everyone to check APR2 options for accomplishing any given request before submitting a RegistrarConnect request.
Important Note About Instructor/Advisor Permissions in RegistrarConnect
Our new system is built to streamline many aspects of registration requests and academic petitions. The majority of requests that require students to receive permission from their instructors and/or advisors are now automated. When students submit a ticket, the system will know what type of permission they need to receive based on the type of request. They will then be asked to select the relevant instructor, advisor, or department chair that they wish to review the request. The system will then notify the necessary parties who will review the request and then confirm or deny their permission.
Advisors and Instructors can use RegistrarConnect's native approval system to review student requests, but department chairs will be required to access a Slate workflow to approve requests from faculty and students. Both of these processes are explained in detail in the instructions below.
If a request requires more than one party's approval the system will forward it to one party at a time. This means that you may not see a request until it has been approved by the first responsible party and you will not see it if that party denies the request.
Important Note About RegistrarConnect Email Notifications
Course Instructors and Advisors can log into RegistrarConnect at any time to see their current pending approvals. However, you will receive an email reminder that you have pending approvals in your que once a day. All notifications from RegistrarConnect are delayed by up to one business day so if you are expecting a student's request then please check your portal to see the most up to date information.
Instructions and Guides
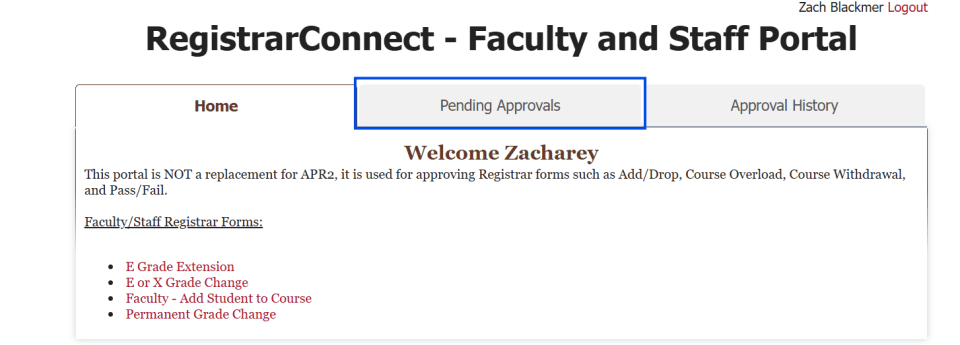
- Log into RegistrarConnect
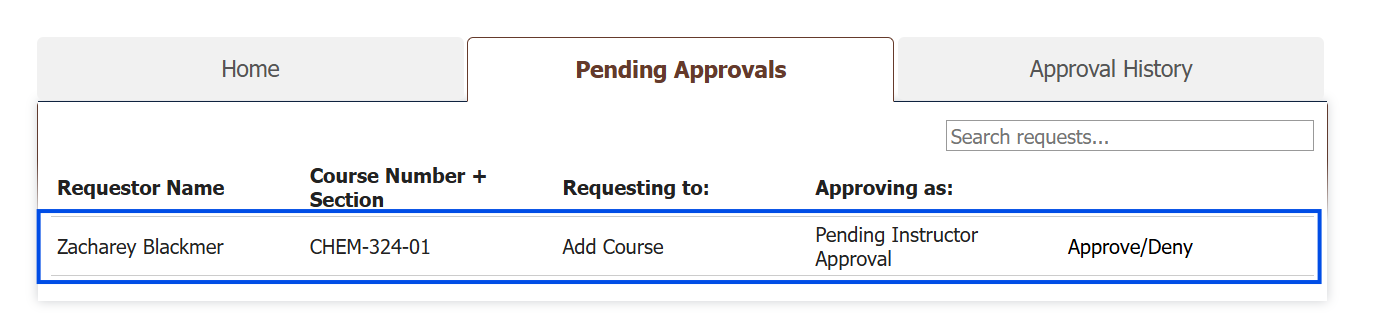
Select the "Pending Approvals" tab at the top of the page:
- You will then see all of your pending requests.
You can sort the requests by clicking on any of these column headers:
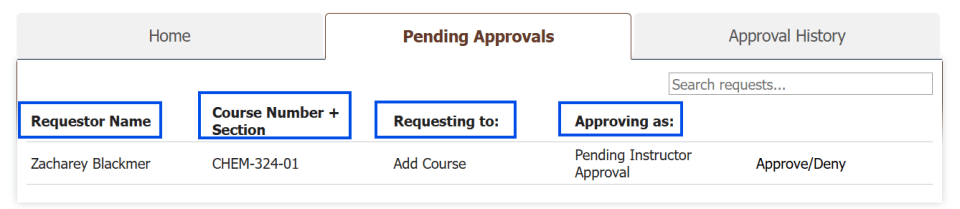
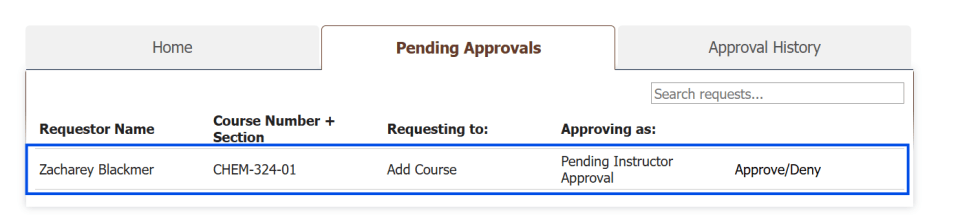
Click on the request you want to review:
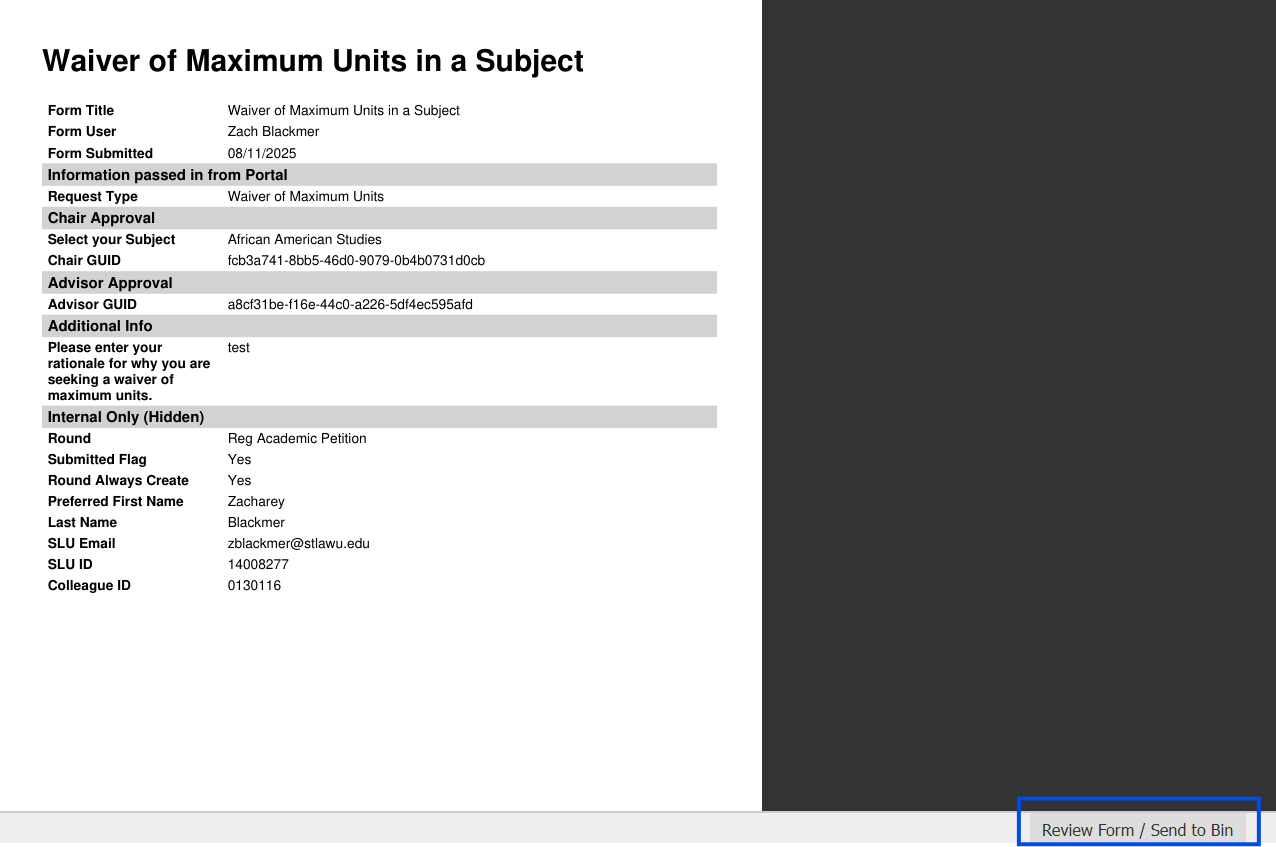
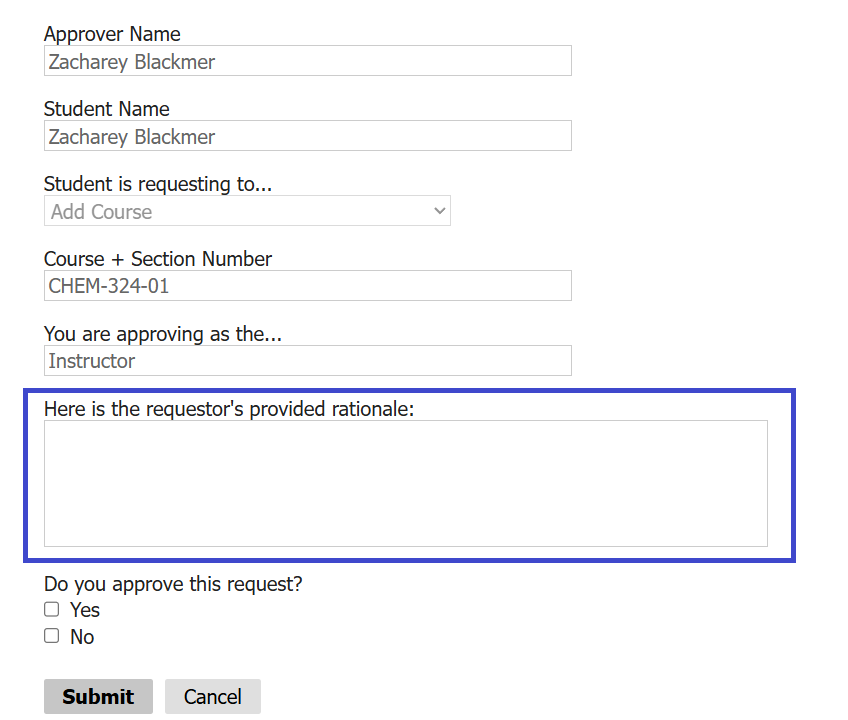
You will be taken to the request review form that will display all of the relevant information. Please note that some sections may be blank based on the type of request. For instance, the student rationale section will only fill if the request requires an academic petition.

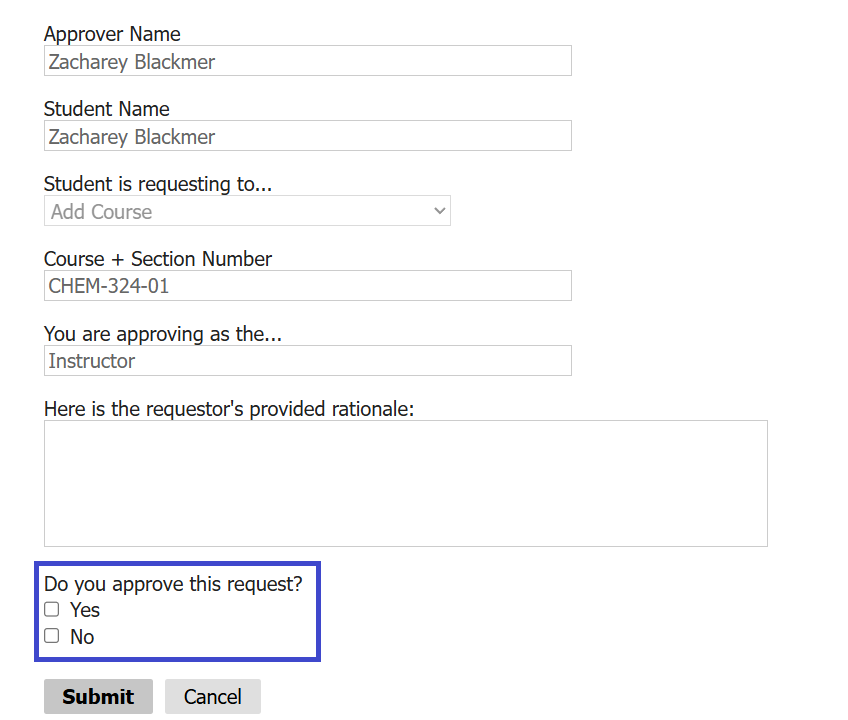
Click the "Yes" or "No" option at the bottom to approve or deny the request:

If you approved the request, you will be able to leave a note for the registrar's team and academic petitions committee. This is not required.

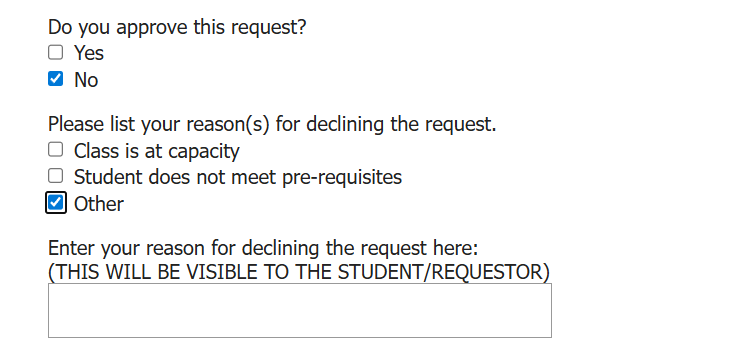
If you deny the request, then you will need to provide an explanation that will be shared with he student. The requestor will be notified about the denial the following day at 10:00 am EST.

- Click "Submit" to finish the approval.


- Log into to the Registrar Tickets Workflow
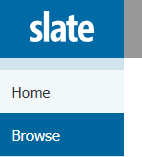
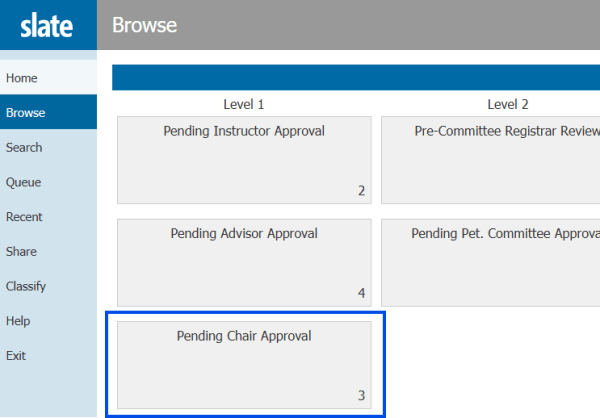
Select the "Browse" option in the left hand navigation menu:

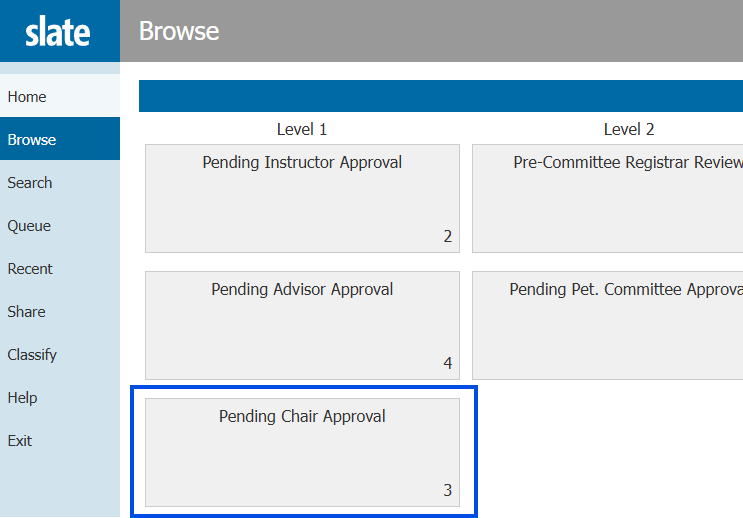
Click on the "Pending Chair Approval" bin:
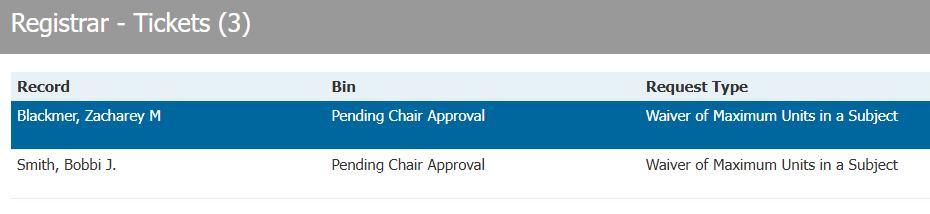
- Select all of the requests in that bin:
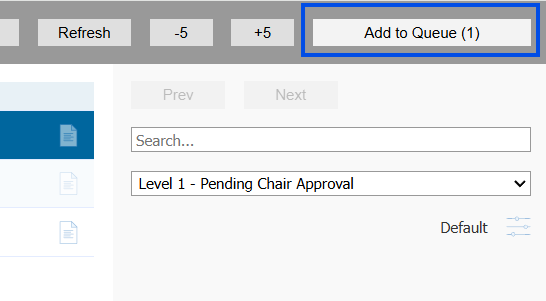
Click "add to que" in the top right hand corner:

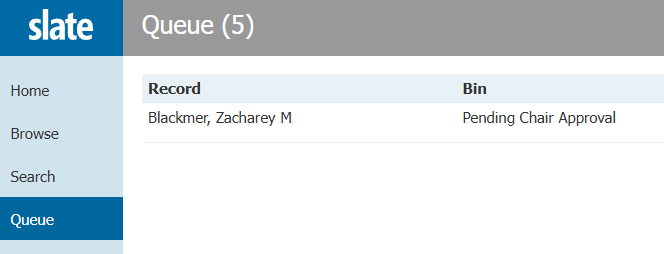
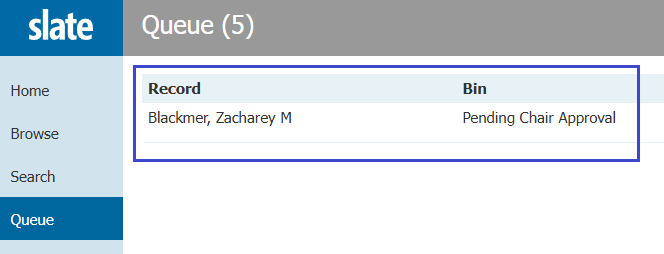
Select the "Que" option in the left hand navigation menu:

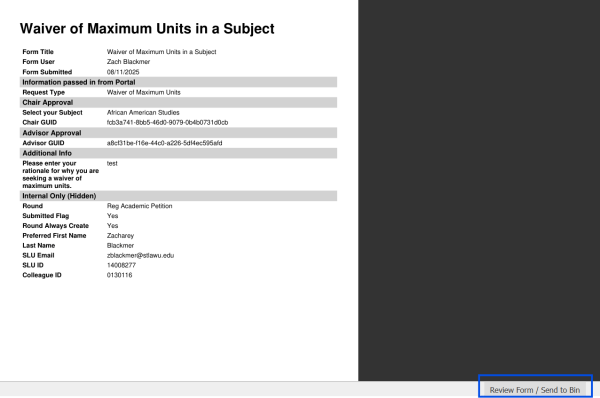
Click on the request you want to review:

Click the "Review Form/Send to Bin" button in the bottom left hand screen:
Choose the type of request you are reviewing in the drop down menu in the review form:
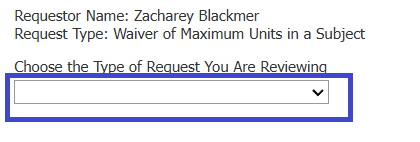
- Follow the directions in the review form.
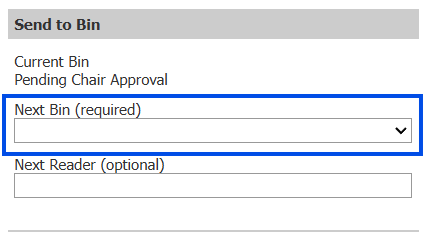
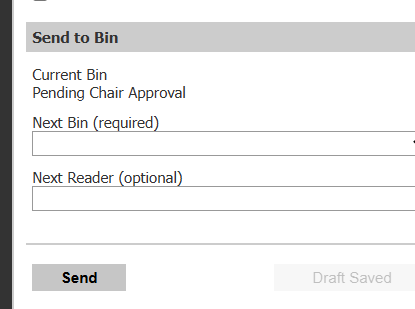
Once you have complete the review form, you will see an instruction for which bin to send the request to. Choose the appropriate bin from the "Next Bin" drop down under the "Send to Bin" heading:

- Click "Send" in the bottom right hand corner: