
This page outlines how to configure audio and video settings for calls to ensure your devices are working properly and also how to place a test call to confirm. Following these steps will help you achieve the best call experience and troubleshoot issues before joining important meetings or making calls.
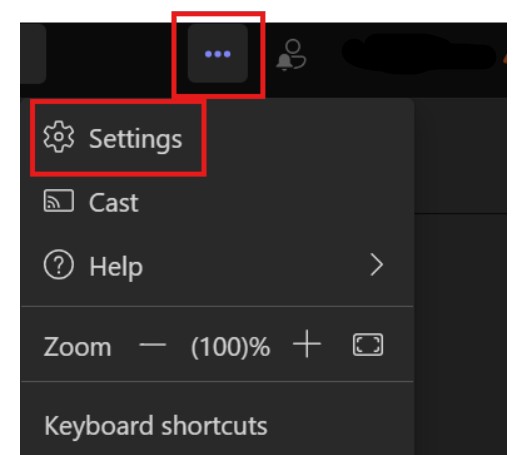
- At the top, open the menu in Microsoft Teams by selecting ... > Settings
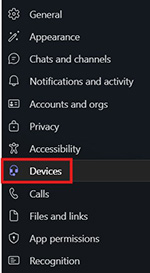
- Go to Devices (left)
- Under the Audio settings area, choose your preferred Microphone and Speaker from the drop-down menus.
- You can also set Automatically adjust mic sensitivity and Sync device buttons to On
- If you plan to use a headset, you may want an additional speaker to ring.
- Select the desired speaker under the Secondary Ringer menu.
- Under the Video settings area, choose your preferred Camera from the drop-down menu.
- Note: you should be able to see a preview of the camera once selected
Let's Do a Test!
- Under the Audio settings area, choose Make a test call
- An active call window will open with recorded voice to test your Speaker and Camera. Follow the vocal prompts to test your microphone.
Adjusting audio and video settings in an active call (or meeting):

- Choose the menu option adjacent to the Mic icon to adjust either the Speaker or Microphone
- Choose the menu option adjacent to the Camera icon to adjust the Camera
Setting a virtual background:
- In an active test call, regular call or meeting - choose the menu option adjacent to Camera and then More video effects and settings
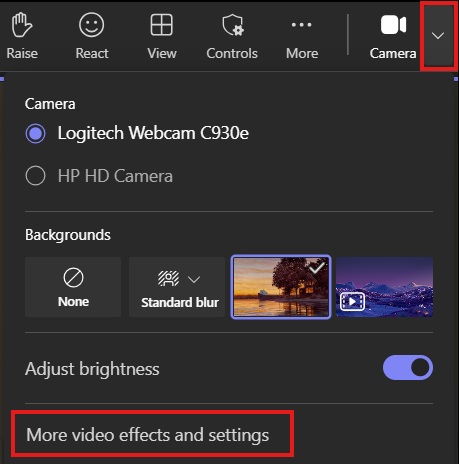
- In the following window, you can choose:
- one of the default images to use as a background
- Add new to upload an image of your choice
- Standard blur instead of an image
- None to remove the virtual background
- Click Apply to save your setting