Add Authorizations for Students
Follow these steps for Add Authorizations:
- Log in to Self-Service/APR2 and access the course catalog to search for courses to add to your course plan.
Add a course to your course plan.
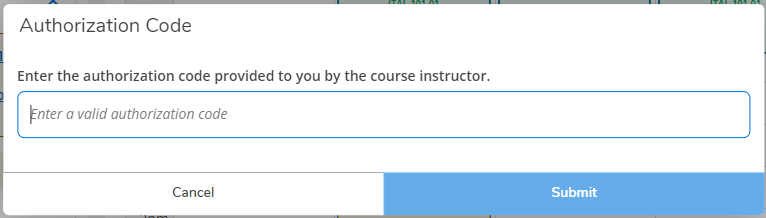
- If you click on the blue register button at this point, a box (pictured below) will appear asking for an authorization code. The University does not use authorization codes to add courses. You will not actually have to enter a code once the faculty grants you permission to register. Please continue with the steps below for information to add the course.
- If you receive this message, you have not yet been granted permission to add the course as we are not utilizing the authorization code function.
Popup box asking for an authorization code. The University does not use authorization codes to add courses so if you receive this message it means you have not yet been granted permission by the instructor to add the course. - Email the faculty member to request to be added to the course. Your email must include the following:
- First and last name
- Student ID number
- Class level (FY, SO, JR, SR)
- Major(s)/minor(s)
- Full course information, including section number. Example: AAH-100-01
- List any other important information that was listed as required in the course description in the course catalog. You should mention if you meet the pre-requisites or course restrictions.
Note: The Registrar’s Office cannot permit you to be added to a course, you must receive this permission directly from the course instructor.
- If granted permission to add the course, the faculty member will confirm this with you via email. You will likely need to refresh or log out of Self-Service/APR2 in order to refresh the page to see the next step.
Access the course in Self-Service/APR2. You will see under the course, a blue banner message has populated and will say “Authorized for Add” (pictured below)
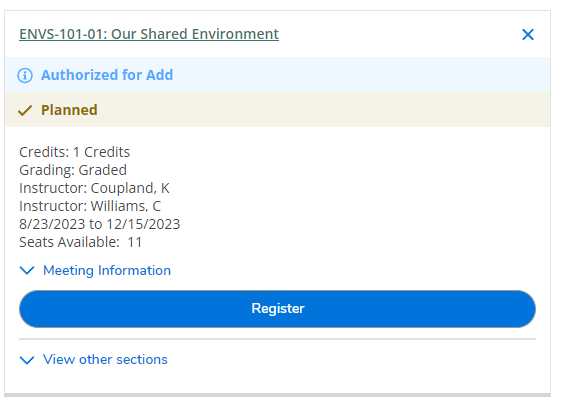
Course detail with the blue "Authorized to Add" banner beneath the course title. - You can now click the blue “Register” button to officially add the course, and the course will turn green on your course plan.

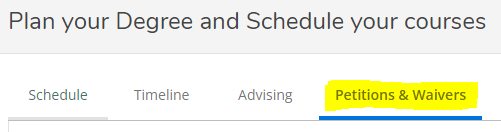
You can view your add authorizations and pre-requisite waivers at any time in Self-Service/APR2 under the Petitions & Waivers tab. If you do not see your add authorization listed here, please contact the course instructor.