Add Authorizations for Faculty
To be used during the add/drop period.
Important Information:
- By granting an add authorization, you will be able to override your course cap, pre-requisites and course restrictions. You do not need to contact the Registrar’s Office to increase your course cap through use of this tool.
- You can override any applicable restrictions that are already set to the course section. For example: “No FY’s”, “No SR’s”, etc.
- You can override any course restriction with add authorization.
If you have any questions, contact the Registrar’s Office between the hours of 8:30AM – 4:30PM by phone at 315-229-5267 or by email at registrar@stlawu.edu.
Steps to Grant Add Authorization
Students will email to request permission to add your course during the add/drop period. Before you email the student to inform them they may add the course, you must grant them authorization through the Self-Service/APR2 system.
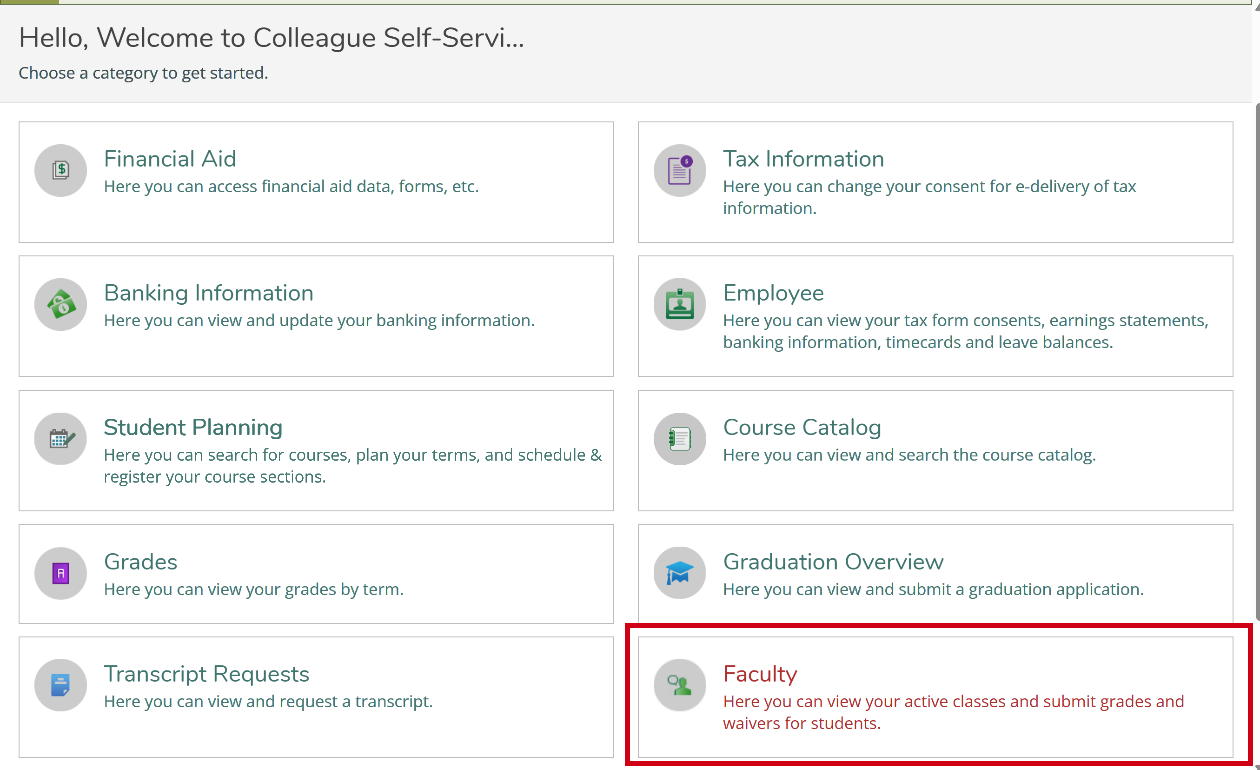
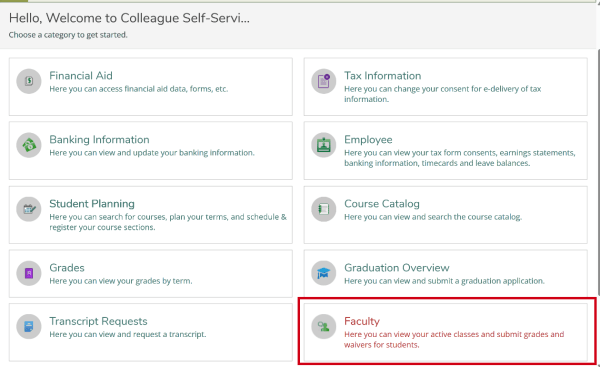
- Log into Self-Service/APR2. Select “Faculty” from the main screen.
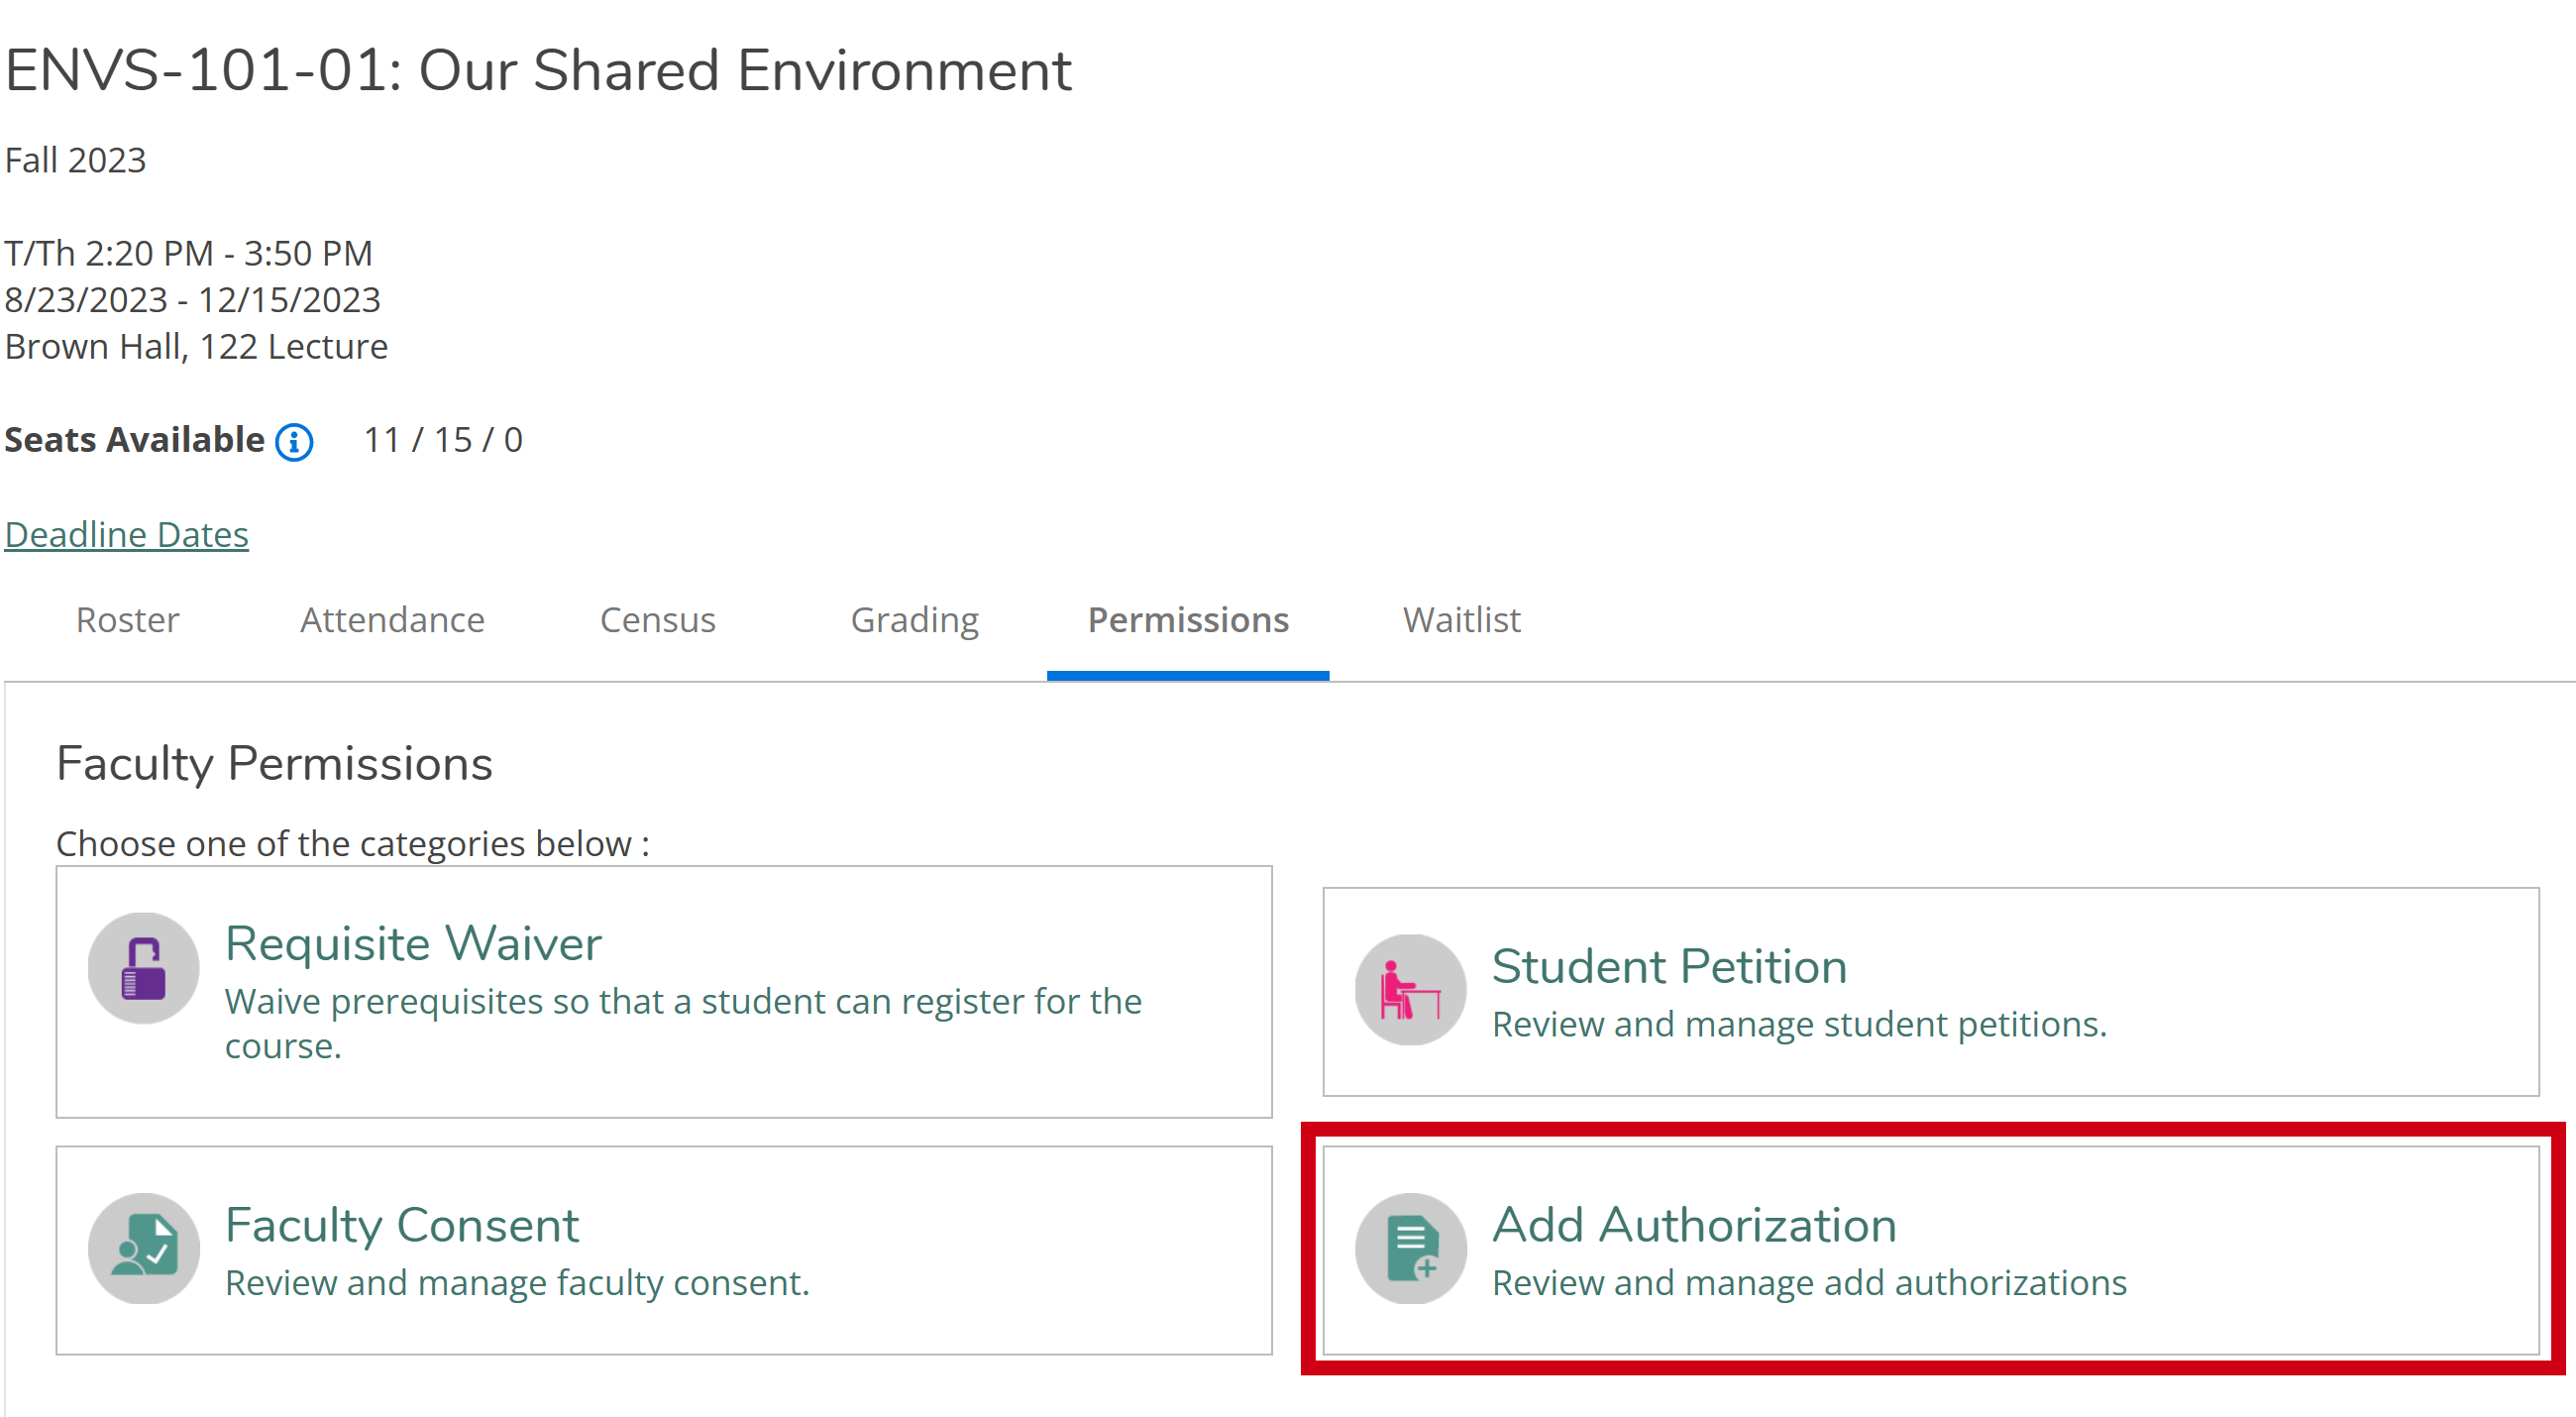
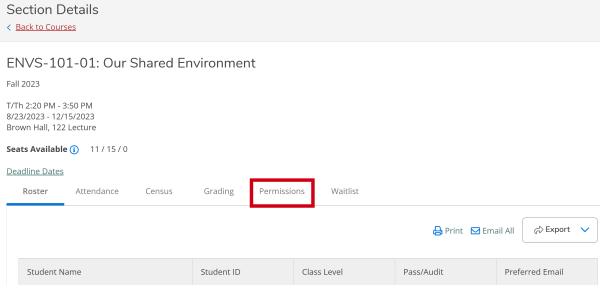
- Select the appropriate course section that you want to add the student to.
- The selected course section will appear as below. Select the “Permissions” tab.
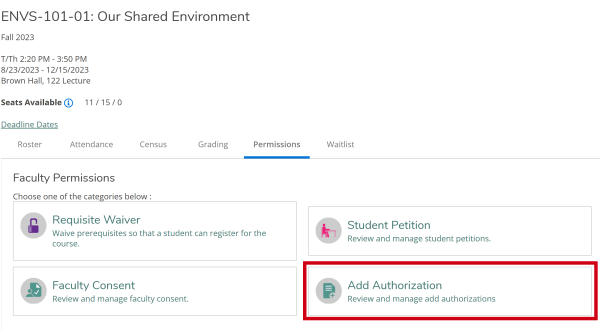
- Select “Add Authorization”.
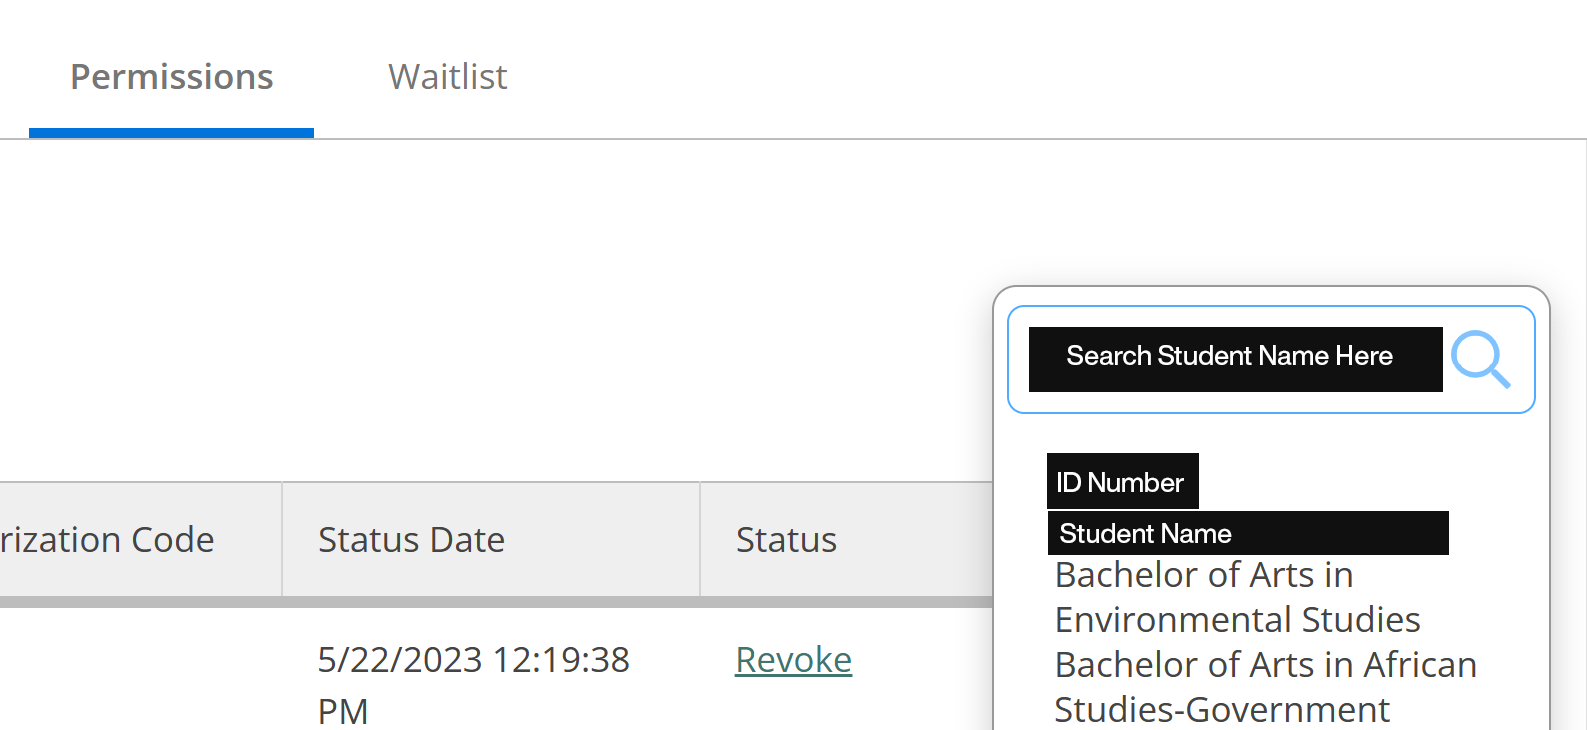
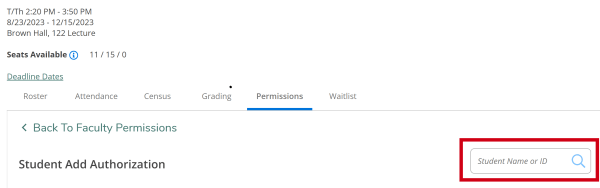
- Search for the student in the search box. The student will be required to provide you with the following information:
- First and last name
- Student ID number
- Class level (FY, SO, JR, SR)
- Major(s)/minor(s)
- List any other important information that was listed as required in the course description in the course catalog.
- Click on the appropriate student name that matches the above information (you must click on the auto-generated name in order for it to populate to the next step).

- Review the student name one final time, and click “Ok” to grant the student authorization to add the course. You may select “Cancel” if this is the wrong student.

- You will receive a certification message that the add authorization has been granted. This will populate in the upper right hand corner of your screen.
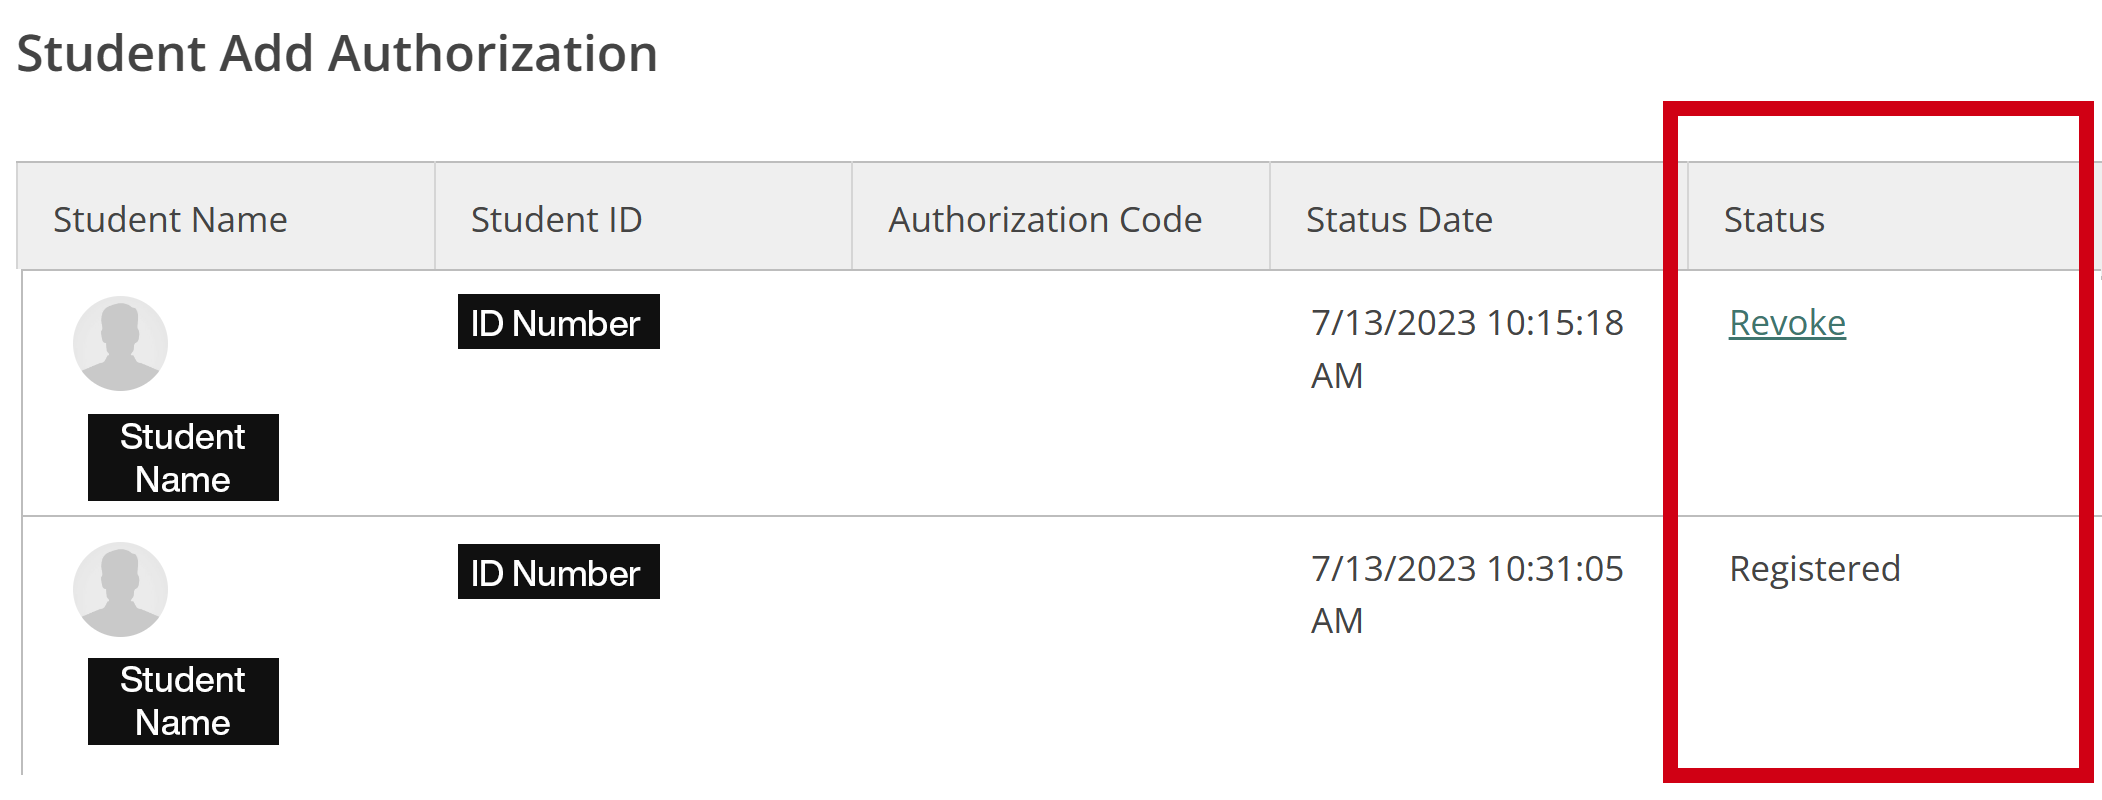
- You will also see the student name populate under your “Student Add Authorizations” list.
- Within the "Student Add Authorizations" list there will be a "Status" column.
- You will see in this column that you have the opportunity to revoke authorization.
- Once the student has registered for the authorized course, the status will update to "Registered"
- After the student registers, you will not be able to revoke the add authorization. You will need to contact the student and Registrar’s Office in order to revoke the registration.

"Student Add Authorization" list showing a student whose authorization can still be revoked and a student who has finished registering for the course.
- Once add authorization has been granted, email the student to confirm that they may self-register for the course in Self-Service/APR2.